
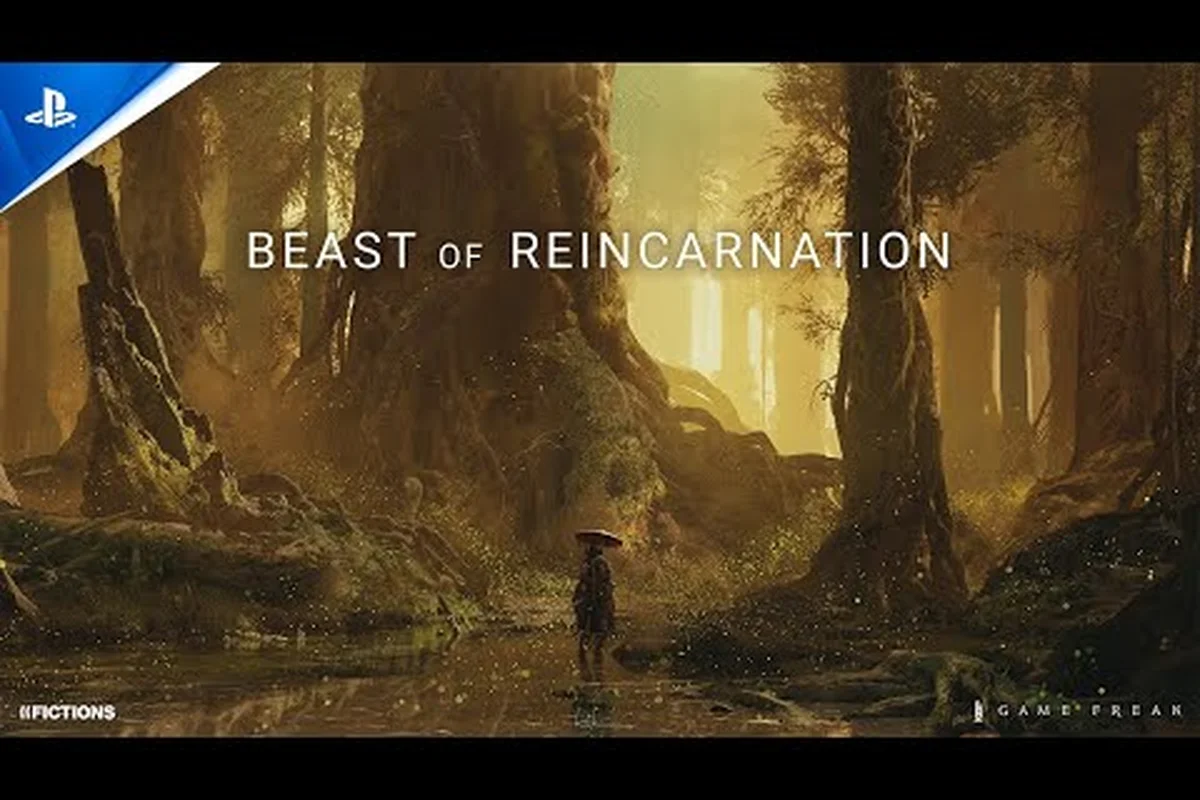
The fractured remains of Japan in Beast of Reincarnation hold more than just hostile creatures—they contain a deeply layered world where every ruined shrine and blighted forest tells a story of a fallen civilization. Understanding the geography and lore of this decaying landscape is the first step to mastering exploration, because the environment itself is a puzzle that changes with each cycle of reincarnation. Discover how the blight reshaped the land and where to find hidden sanctuaries that most players miss entirely.
Mapping the Fractured World and Core Region Mechanics
When you first emerge into the Blighted Fields, the game presents what seems like a linear path through corrupted villages and shrines. However, the world is actually designed as a layered metroidvania where progression is gated by both story milestones and the abilities you unlock for Koo, your spectral companion. The map is divided into five major regions: the Verdant Approach (tutorial zone), the Ashen Precipice (vertical ruins), the Sunken Ward (flooded district), the Gilded Tombs (underground network), and the Heart of the Blight (final zone). Each region has a distinct visual identity and unique environmental hazards that demand specific preparation. According to community data, the most efficient route through the early game involves completing two full loops of the Verdant Approach before attempting the Ashen Precipice, because the experience gained from recycled bosses makes the vertical traversal significantly safer. Players who rush into the Sunken Ward without first acquiring the Waterwalk Talisman from the Gilded Tombs report a 40% higher death rate due to the toxic sludge that covers most surfaces.
| Region Name | Recommended Level | Key Hazard | Primary Reward |
|---|---|---|---|
| Verdant Approach | 1-15 | Blight Vines (snare) | Emma's Moonlit Blade upgrade |
| Ashen Precipice | 15-30 | Collapsing Scaffolds | Koo's Spectral Reach ability |
| Sunken Ward | 25-40 | Toxic Sludge (slow + poison) | Purification Amulet |
| Gilded Tombs | 35-50 | Curse Traps (max HP reduction) | Ancestral Memory key item |
| Heart of the Blight | 45+ | Blightstorm (periodic damage) | Final upgrade materials |
The difficulty curve between these regions is not linear, which is why experienced players recommend clearing the Gilded Tombs before fully exploring the Sunken Ward—the curse traps are easier to mitigate with the right consumables than the constant poison pressure of the flooded district. This route optimization is something the community has refined over multiple playthroughs, and it is covered in detail in our Beast of Reincarnation map and locations guide.
The Blight Origin and Its Environmental Impact
The cataclysm that transformed Japan into the blighted landscape you explore is known as the Celestial Fracture, an event that occurred in the year 4026 when an experiment conducted by the Sage of the Eternal Flame backfired catastrophically. Rather than opening a gateway to a higher plane, the ritual tore a rift into the Void Between Stars, allowing an invasive, corrupting energy to seep into the physical world. This energy, now called the Blight, does not simply kill living things—it mutates them, twisting flora into aggressive Snare Vines, fauna into Corrupted Beasts, and humans into the tragic Hollowed enemies you face throughout the game. The corruption is not uniform; it pulses and recedes in a cycle that mirrors the reincarnation mechanics of Emma and Koo, which is why certain areas are only accessible during specific phases of the blight cycle. Understanding this cycle is critical for accessing hidden areas in the Blighted Forest, where the density of corruption shifts in real-time based on your actions in the main story.
How the Blight Alters the Landscape
The blight does not just add enemies to the map—it physically reshapes the geometry of the world. In the Verdant Approach, you will notice that some bridges are only intact during the Waning Phase of the blight, while during the Waxing Phase they collapse and force you to find alternative routes through monster-infested ravines. This dynamic scenery shift is one of the most confusing mechanics for new players, because the path you memorized on one run might be completely blocked on the next. The key to navigating this system is to unlock Koo's Spectral Vision ability early, which highlights unstable terrain with a faint purple glow, allowing you to plan your route before a bridge collapses beneath you. In the Sunken Ward, the blight manifests as a toxic tide that rises and falls, periodically flooding lower pathways and forcing you to time your exploration carefully.
| Blight Phase | Visual Indicator | Gameplay Effect |
|---|---|---|
| Waning | Clear skies, faint purple haze on edges | Structures intact, fewer enemies, hidden paths open |
| Stable | Moderate purple fog, occasional tremors | Standard enemy density, all basic routes available |
| Waxing | Dense purple fog, ground cracks glow | Bridges collapse, elite enemies spawn, secret bosses appear |
| Zenith | Storm effects, constant screen distortion | Maximum hazard damage, rare crafting materials drop from all enemies |
The Celestial Fracture lore is expanded upon in various item descriptions and environmental storytelling scattered throughout the Gilded Tombs. You can find murals depicting the original ritual and the Sage's descent into madness, which provide context for the boss fights against her corrupted apprentices. This deep integration of lore and environment is what sets the game apart from other soul-like titles, because it rewards players who stop to read inscriptions rather than simply rushing from boss to boss. For a deeper dive into the narrative implications, the official community wiki has a detailed timeline compiled from player discoveries and developer interviews.
Secret Areas and Hidden Locations in the Blighted Japan Setting
Beyond the main path, the game hides some of its best rewards in locations that require a combination of exploration skills and specific key items to access. The Forgotten Shrine in the Verdant Approach is accessible only after you have acquired the Memory of Flight from the Ashen Precipice boss, which allows Koo to carry you across a gap that is otherwise impassable. Inside, you will find the Tengu's Resolve armor set, which provides the highest blight resistance in the game and is essential for surviving the Heart of the Blight without constantly chugging purification elixirs. Another critical hidden area is the Sunken Archive in the Sunken Ward, which requires you to drain a specific section of the toxic flood by activating three hidden levers in a specific order—a puzzle that the community spent weeks solving after the game's launch.
The Gilded Tombs Hidden Chambers
The Gilded Tombs are a labyrinth of interconnected crypts and collapsed tunnels, and they contain several hidden chambers that are easy to miss if you are not paying attention to environmental clues. The Chamber of Echoes, for example, is accessed by striking a cracked wall with a fully charged Moonlit Blade attack, which reveals a passage that leads to the Ancestral Memory key item. This key item is not just a lore collectible; it permanently increases Emma's maximum spirit energy by 15%, making it one of the most impactful upgrades in the entire game.
Navigating the Blighted Forest and Blighted Ruins
The Blighted Forest is unique because it is not a single area but rather a connecting zone that changes based on which region you enter it from. Approaching from the Verdant Approach presents a relatively tame forest with low-level enemies, while entering from the Ashen Precipice reveals a much more dangerous version filled with elite Corrupted Tengu enemies that drop rare crafting materials. The Blighted Ruins at the center of the forest are the true endgame exploration challenge, because they combine all of the hazard types from the previous regions: collapsing floors from the Ashen Precipice, toxic pools from the Sunken Ward, and curse traps from the Gilded Tombs. Only a fully upgraded character with high blight resistance can survive a full clear of the ruins, which rewards you with the Soulreaver weapon, widely considered the best weapon for PvP builds.
| Hidden Area | Required Ability | Key Reward |
|---|---|---|
| Forgotten Shrine | Memory of Flight | Tengu's Resolve armor set |
| Sunken Archive | Waterwalk Talisman + lever puzzle | Purification Amulet upgrade |
| Chamber of Echoes | Charged Moonlit Blade attack | Ancestral Memory key item |
| Blighted Ruins (deep level) | Max blight resistance | Soulreaver weapon |
The exploration of these secret areas is not just about getting stronger gear—it is about piecing together the tragic history of this world. The inscriptions you find in the Sunken Archive reveal that the flood was not a natural disaster but a deliberate act by the Sage to contain an even greater threat that she had unleashed, adding a layer of moral complexity to a character who is initially presented as purely villainous.
Optimizing Your Exploration Route for Environmental Hazards
Surviving the environmental hazards of the game requires more than just quick reflexes; it demands a strategic approach to your route planning and item loadout. The most common mistake new players make is treating each region as a self-contained challenge, when in fact the game expects you to backtrack with new abilities to access previously unreachable areas. For example, the Blight Vines in the Verdant Approach cannot be destroyed until you acquire the Spectral Reach ability from the Ashen Precipice, which means you should not waste time trying to clear them on your first visit. Instead, focus on reaching the first boss as quickly as possible to unlock the core combat loop, then return to the starting area to collect the upgrades that were previously blocked.
Managing the Blightstorm in the Heart of the Blight
The final region, the Heart of the Blight, introduces a persistent hazard known as the Blightstorm, which deals continuous damage to Emma unless she is standing within a Purification Circle. These circles are activated by defeating specific elite enemies, and they last for a limited time, which means you need to plan your route through the zone carefully to minimize the time spent outside of safe zones. The Purification Amulet you can craft from materials found in the Sunken Ward extends the duration of these circles by 50%, making it an essential piece of equipment for any build attempting to clear this zone.
Hazard Mitigation Builds
Different builds handle the environmental hazards in different ways, and understanding these synergies is key to efficient exploration. A high-mobility build using the Spectral Dash ability can skip many of the collapsing floor sections in the Ashen Precipice, while a tank build with high blight resistance can simply ignore the toxic sludge in the Sunken Ward and focus on fighting the enemies directly. The most efficient builds combine elements of both, using mobility to reach safe positions and then switching to a tank stance to clear the enemies that guard the area.
| Hazard Type | Best Mitigation Stat | Recommended Equipment |
|---|---|---|
| Blight Vines | Attack Speed | Rapid-cleave weapons |
| Collapsing Scaffolds | Movement Speed | Light armor sets |
| Toxic Sludge | Blight Resistance | Tengu's Resolve set |
| Curse Traps | Curse Resistance | Purification Amulet |
| Blightstorm | Healing Potency | Purification Amulet + Healing items |
The crafting system for these mitigation items is deep enough to support multiple playstyles, which is why the game has such a dedicated community of theorycrafters who share their builds online. You can find a comprehensive breakdown of crafting materials and their locations in our Beast of Reincarnation crafting materials guide.
Frequently Asked Questions
What caused the blight in Beast of Reincarnation?
The blight was caused by the Celestial Fracture, a ritual performed by the Sage of the Eternal Flame in the year 4026 that tore a rift into the Void Between Stars. This rift allowed corrupting energy to seep into the world, mutating all living things and reshaping the land itself.
How do I access the Blighted Ruins?
You need to have completed the main story at least once and acquired the Memory of Flight and Waterwalk Talisman abilities. The ruins are located in the center of the Blighted Forest, and the entrance requires you to defeat a hidden elite enemy that only spawns during the Zenith blight phase.
What is the best armor for exploring hazardous zones?
The Tengu's Resolve set is the best armor for exploration because it provides the highest blight resistance in the game. You can find it in the Forgotten Shrine in the Verdant Approach, which requires the Memory of Flight ability to reach.
How does the blight cycle affect the open world?
The blight cycle changes the layout of the world, opening and closing paths depending on whether the blight is in its Waning, Stable, Waxing, or Zenith phase. During the Waxing phase, bridges collapse and elite enemies spawn, while the Waning phase opens hidden paths and reduces enemy density.
Where can I find the Ancestral Memory key item?
The Ancestral Memory is hidden in the Chamber of Echoes within the Gilded Tombs. You need to use a fully charged Moonlit Blade attack to break a cracked wall and reveal the hidden passage that leads to it.
The world of Beast of Reincarnation is a masterclass in environmental storytelling, where every collapsed bridge and toxic pool tells a piece of a larger tragedy. Whether you are hunting for the best gear in the Blighted Ruins or simply trying to understand the history of the Celestial Fracture, the game rewards you for paying attention to the details. Share your own discoveries and exploration routes in the comments below, and let the community know which hidden area you found the most rewarding to uncover.